Add dynamic forms Application Installation
Dynamic Forms Installation
Add dynamic form webpart on the page
- Open the page where the webpart needs to be added
- Edit the page and add the webpart (To know how to add a webpart to a page, click here)
- After adding the webpart, open the property pane by selecting the “edit” icon of the webpart
- The pane opens on the right side and different options to configure the dynamic form are available

Add A webpart on the page.
Create Form using New List
- Create new form
- Add new form fields

Create Form using New List Guide Video
Field Setup and configuration
Easy to customize, No coding knowledge required .
Create Form using Existing List
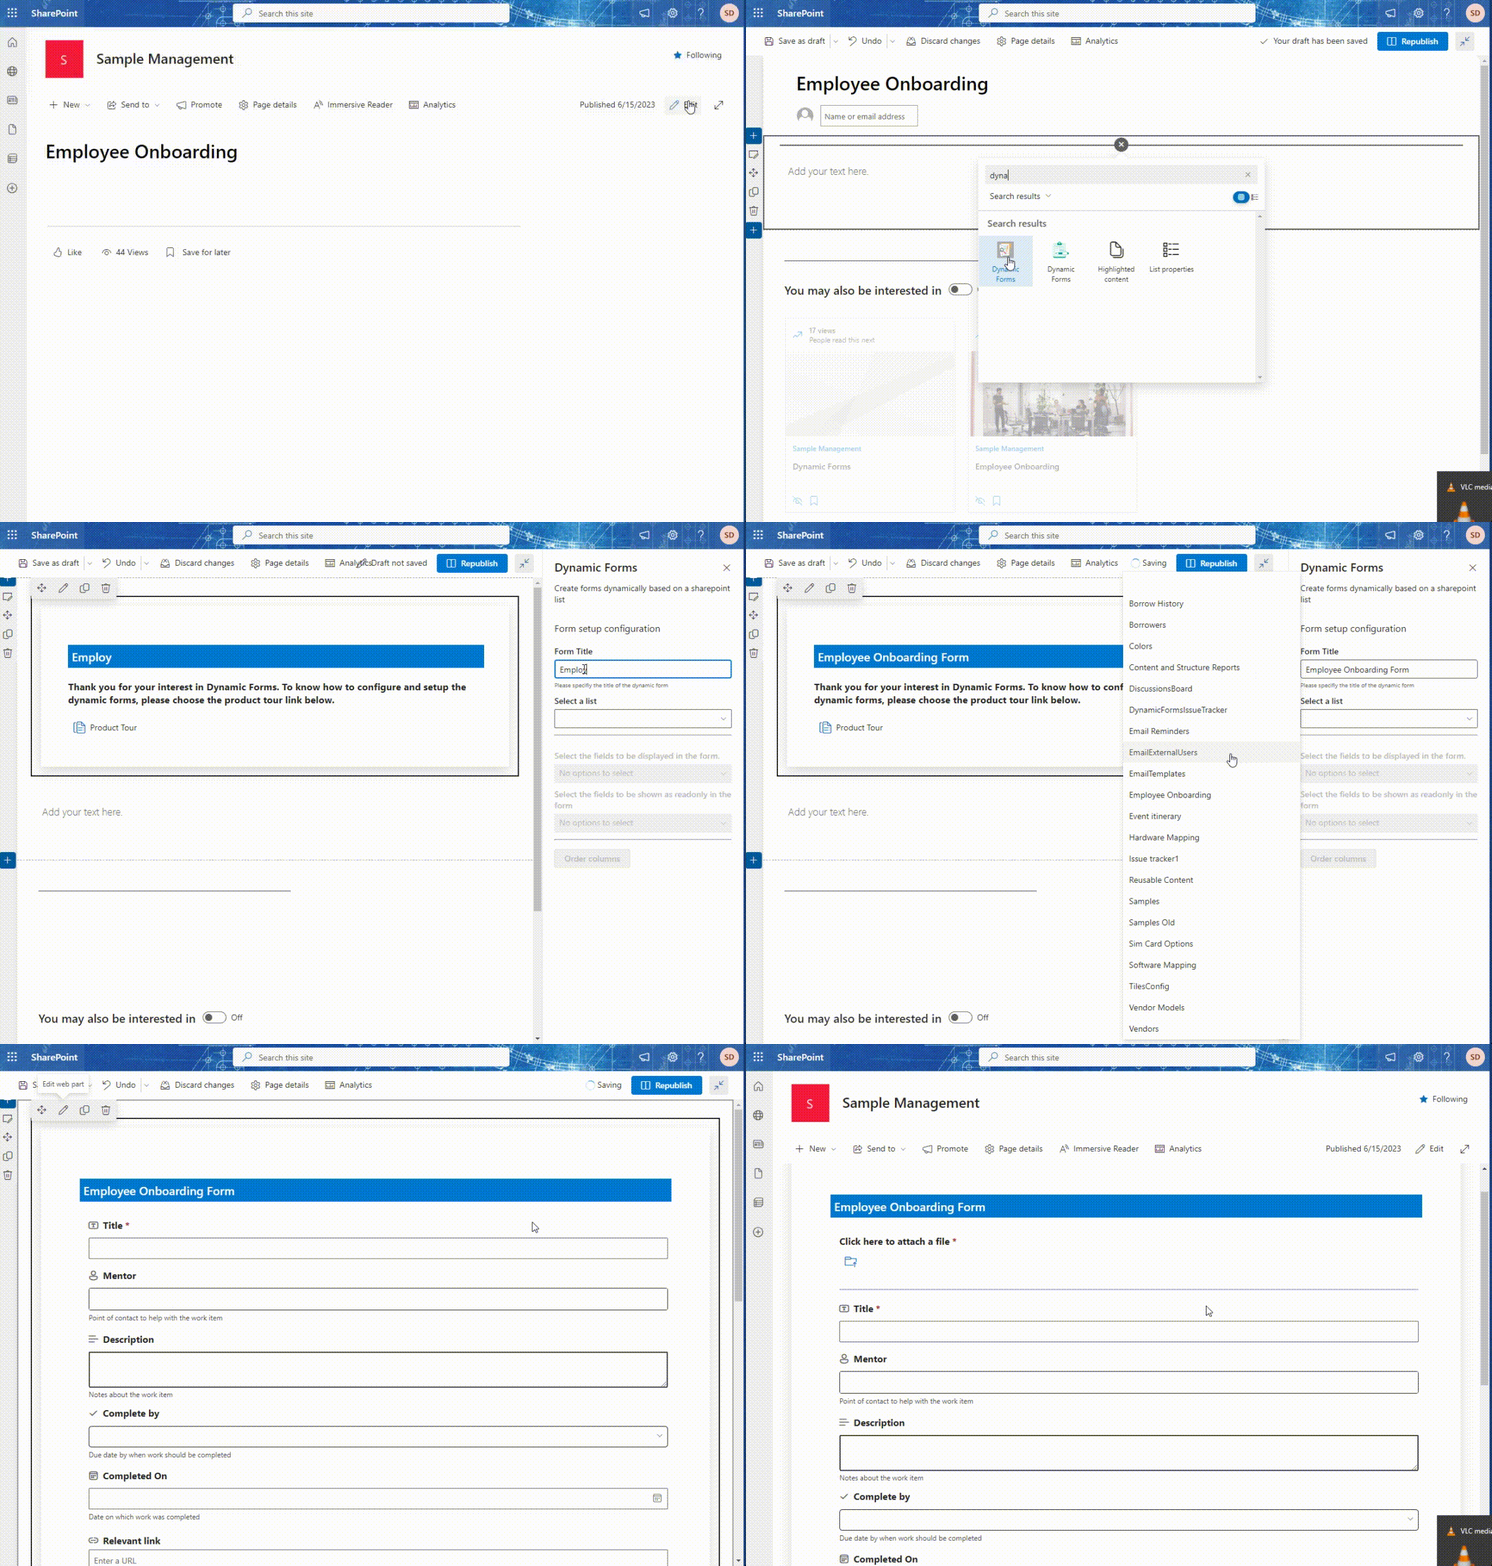
- Add Title for the form
- Select an existing sharepoint list from the current site using the dropdown control
- Post selection of the list, the fields of the list gets populated in the below dropdown
- By default all the fields will be selected to show on the form.
- The mandatory fields will be prefixed with “*”. Eg: “* Title” and cannot be unchecked
- You can use the dropdown “Select the fields to be displayed in the form” optionally to uncheck the fields if any which need not to be shown in the form
- You can use the dropdown “Select the fields to be shown as readonly in the form” optionally to choose to disable columns which you intend to keep read-only
- After finalizing your changes, close the property pane, save and publish the page
Add or remove list fields on the form
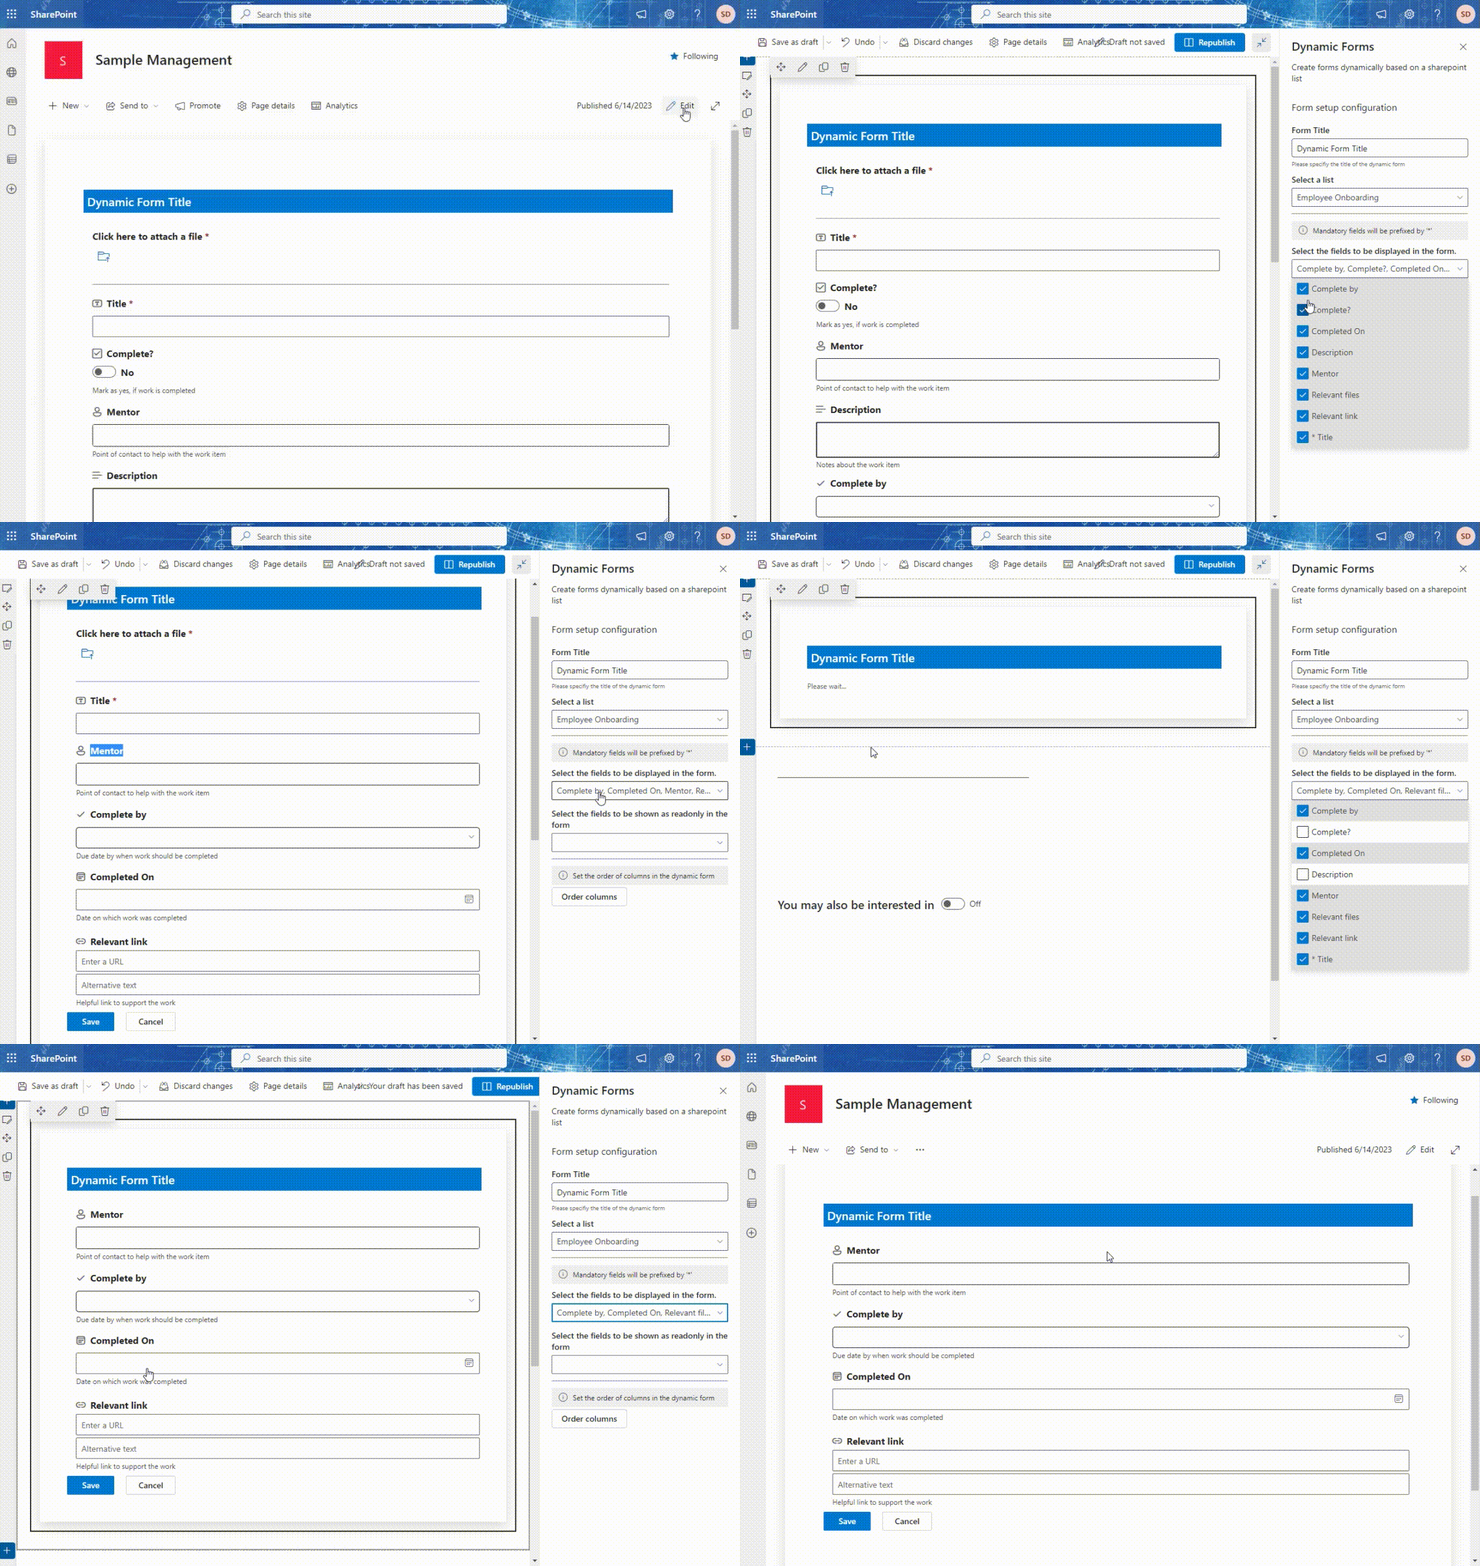
- Edit the page and open the property pane of the dynamic form
- Use the dropdown “Select the fields to be displayed in the form” to uncheck the fields that is not required to be shown in the form
- Use the dropdown “Select the fields to be shown as readonly in the form” to uncheck the fields that needs to be shown as read-only
- After finalizing your changes, close the property pane, save and publish the page
Set specific column(s) read only or disabled for edit
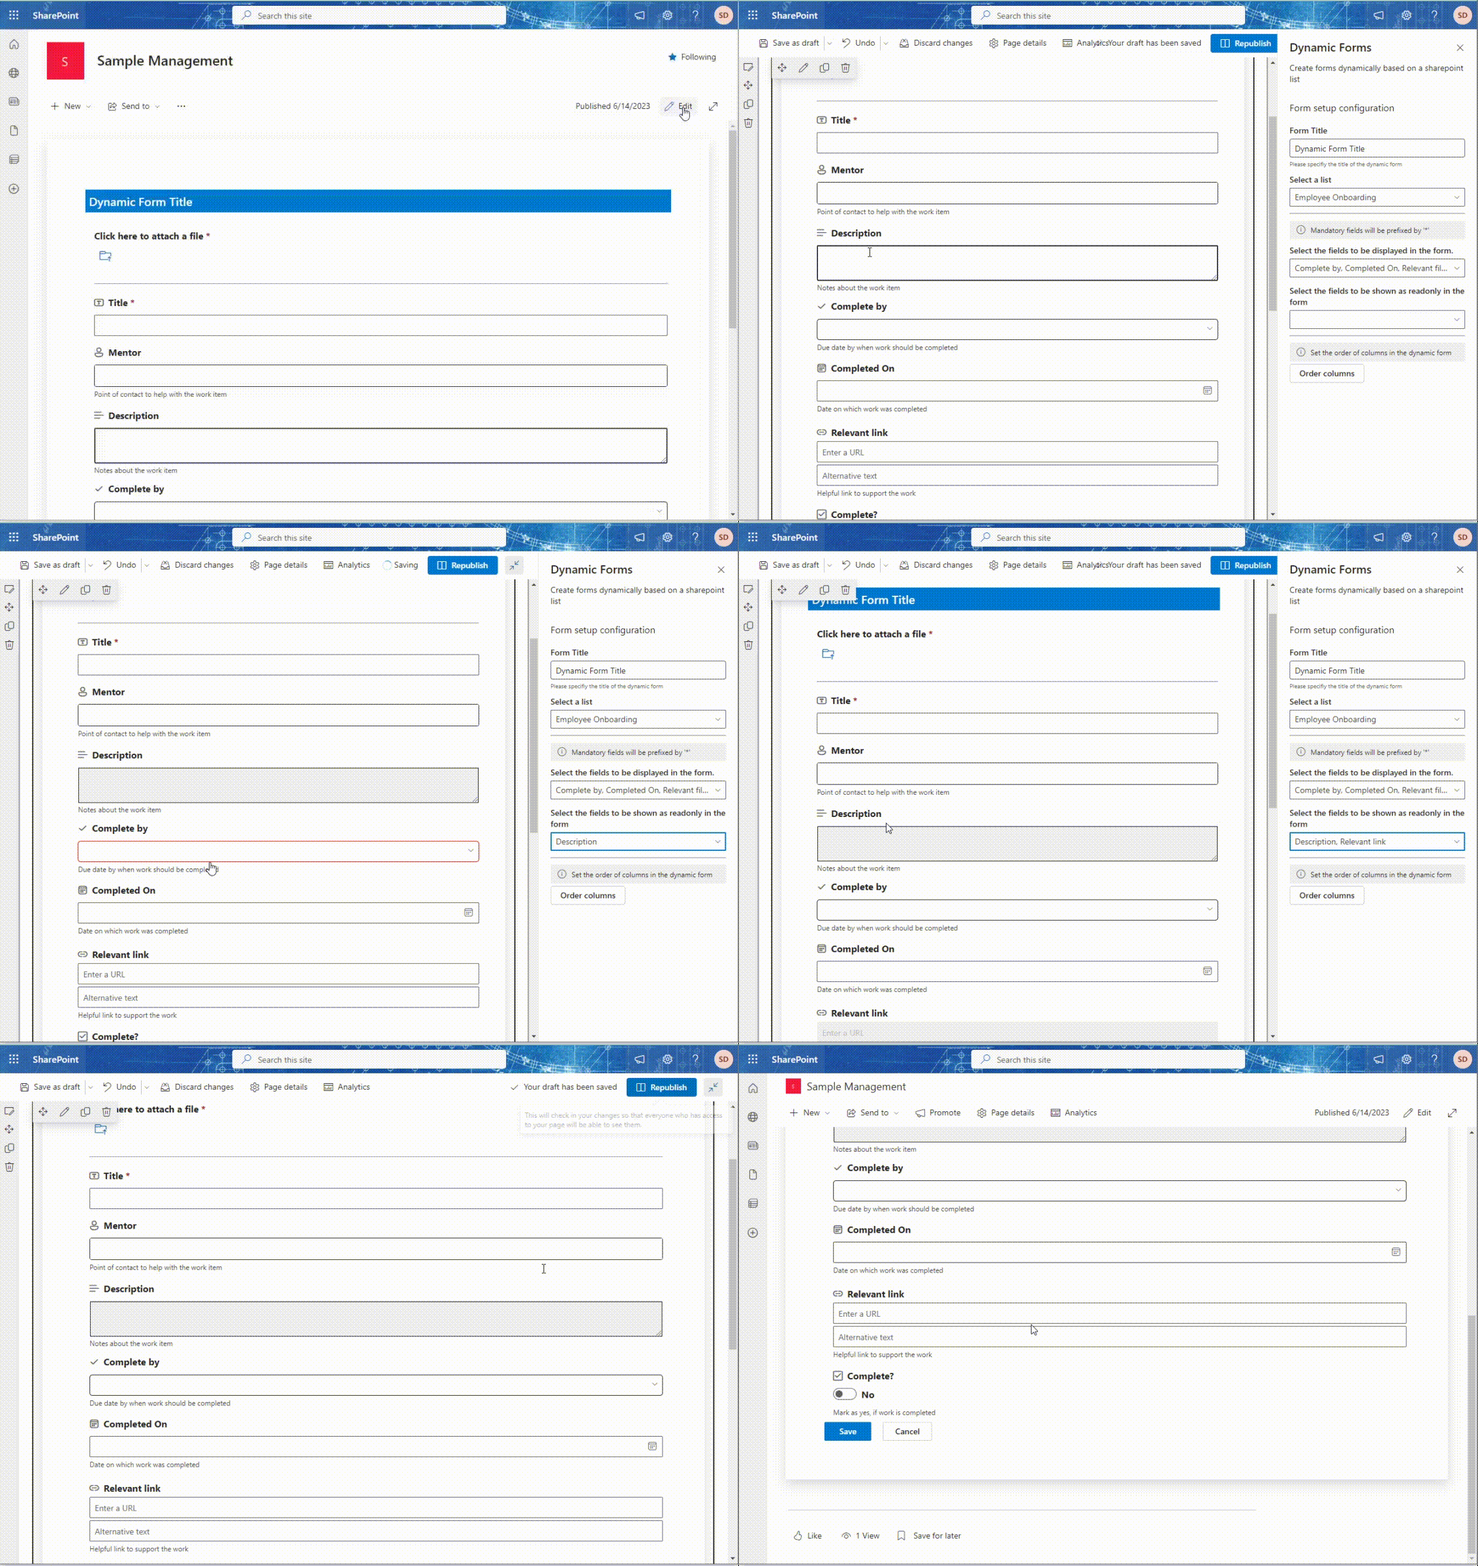
- Edit the page and open the property pane of the dynamic form
- Use the dropdown “Select the fields to be displayed in the form” to uncheck the fields that is not required to be shown in the form
- Use the dropdown “Select the fields to be shown as readonly in the form” to uncheck the fields that needs to be shown as read-only
- After finalizing your changes, close the property pane, save and publish the page
Sort column orders on the form
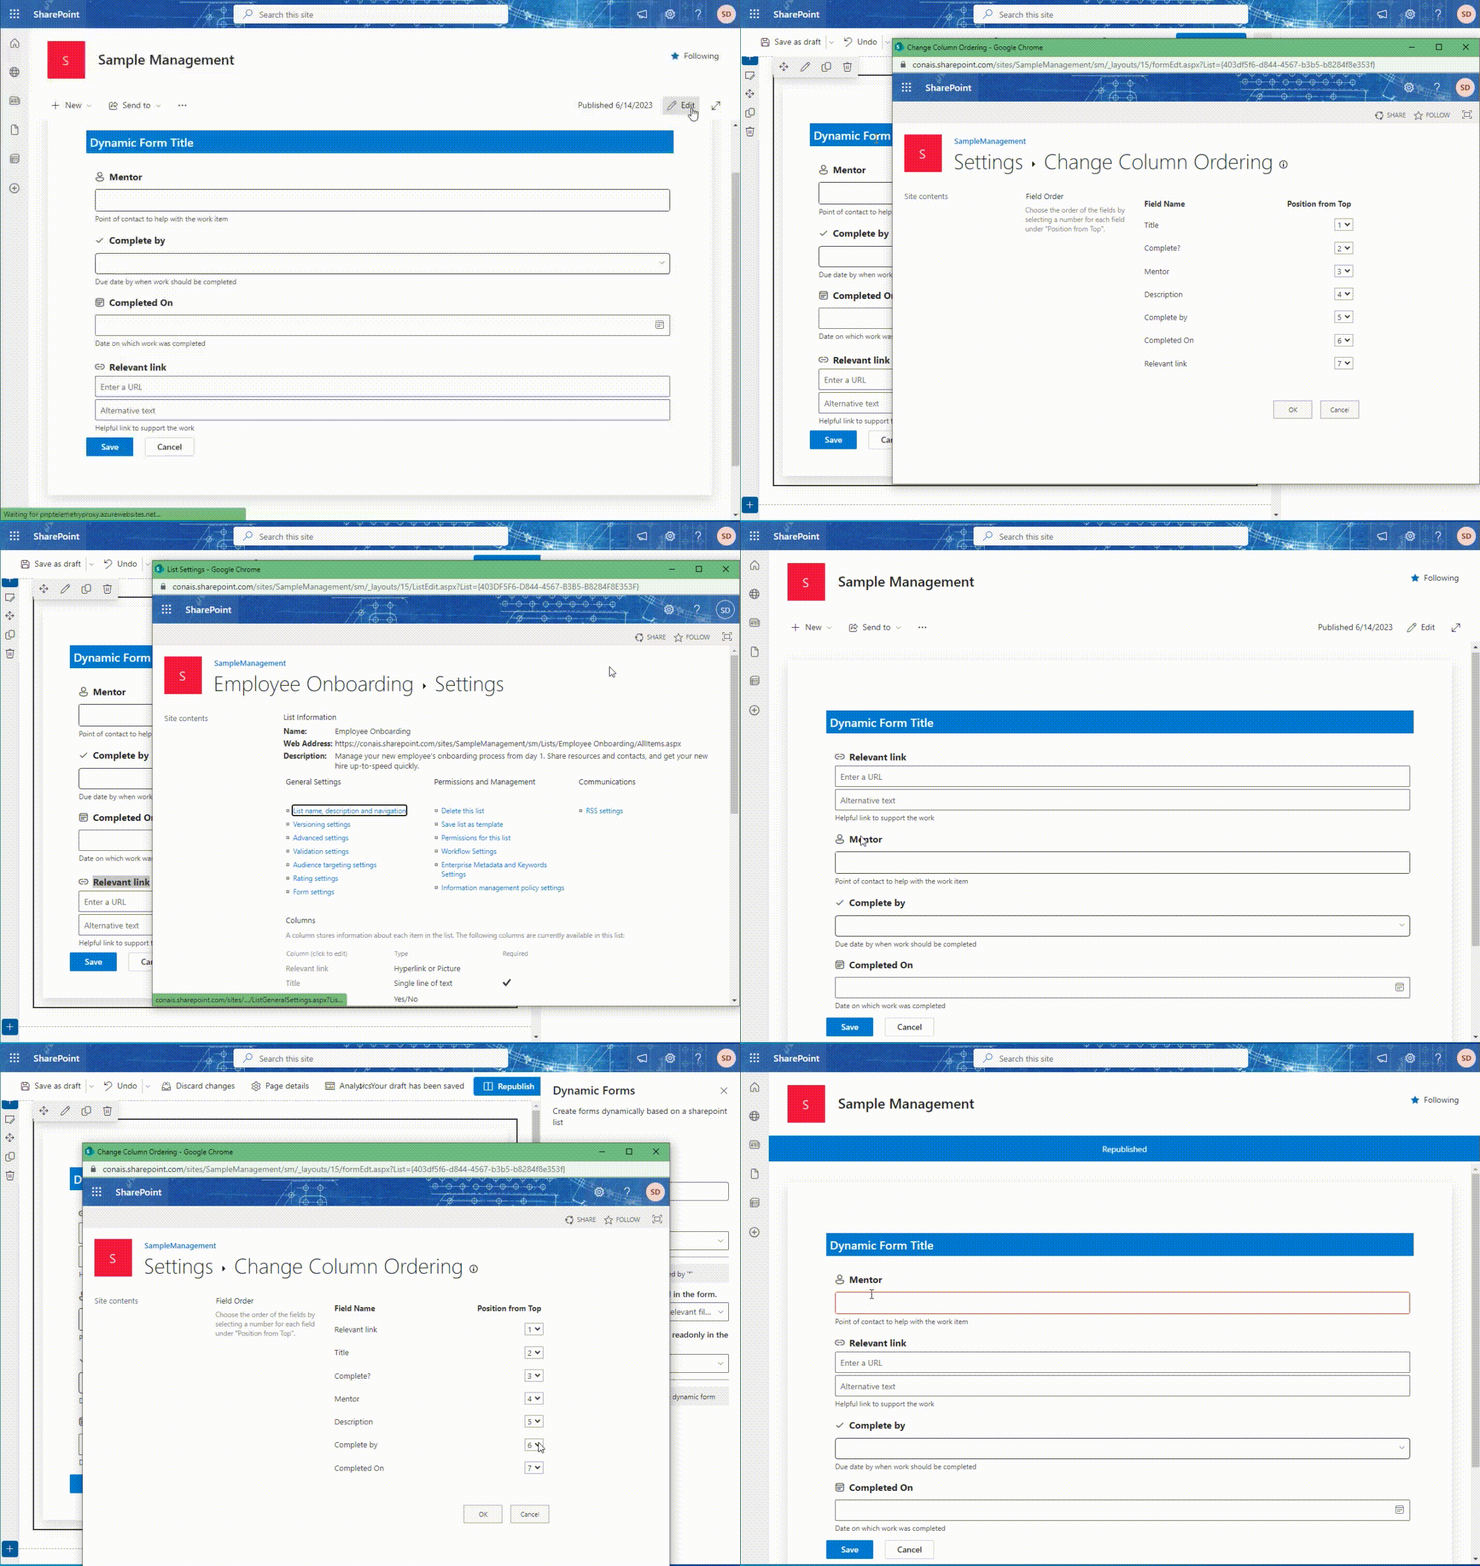
- Edit the page and open the property pane of the dynamic form
- Choose the “Order Column” button
- A new window is open where you can shoose the order of the list form. Once done with the changes, choose OK and close the column order window
- You can refresh the page to see the order effect
- After finalizing your changes, close the property pane, save and publish the page
![]()




2 Comments